The headset positioning guide in Varjo Base helps you to position the headset correctly over your head.
To quickly launch the guide, navigate to the Tools menu and open Headset positioning. Alternatively, navigate to the Headset tab and select Headset positioning guide. You also can set the headset positioning guide to appear automatically every time you put on the headset. Go to the Headset tab in Varjo Base and enable Automatic headset positioning.
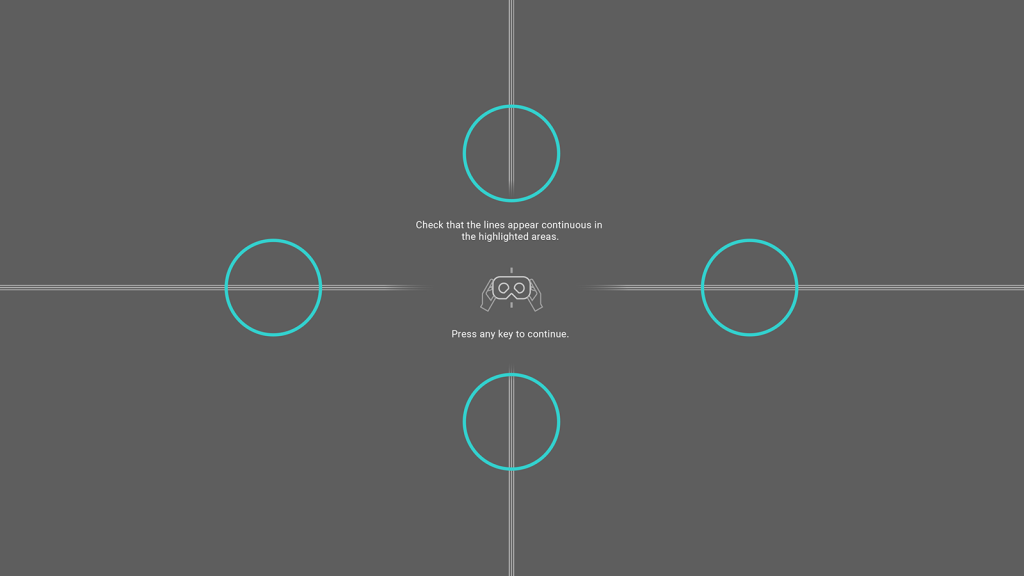
The headset positioning guide shows four lines extending from the center of the display towards the edges. Looking closely, you will see that each line consists of three thinner lines.
Carefully observe the thin lines in the four areas highlighted with blue circles. These are the intersections where the high-resolution focus area meets the lower-resolution peripheral area. When the headset is positioned correctly, the lines will appear continuous in all four areas. If the lines appear broken, blurred, or bent, try moving the headset to improve the image.

The image illustrates an example of good and bad positioning. Adjust the headset so that the lines appear continuous.
If the headset is not positioned well, straight lines in the virtual environment may also appear curved as they travel from the edges towards the center of the display. Additionally, you may notice blue or red halo colors on the edges of light-colored objects.
After you have found the optimal position for the headset, make sure to adjust the headband so that the headset feels stable and stays in place.